Do you have several emails that you use and wished you could combine them all into one place to be more organized? Well, if you’re a Gmail user there is a way to add your domain names from your server or website so that they are all integrated into your Gmail account all in one place. You will be able to receive emails and also send emails so that they look like they are being sent directly from your domain server email. Let's get started.
Step 1: Locate your Domain Email Client Settings
You should have received this information after setting up your email on your server. You will need this information to configure the settings in Gmail to set up a new Alias account.

Step 2: Log into your Gmail Account
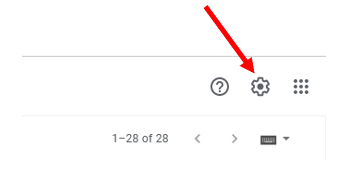
Step 3: Click on the Settings
Click on the settings gear wheel to the upper left, then click on See All Settings

Step 4: Click on the Account Settings
Click on Accounts and Imports as shown below to open up your email account settings

Step 5: Add New email Account
Go down to the section that says 'Check mail from other accounts:'. You will see the list of current email accounts you have set up. If you don't see any then you do not have any alias email accounts set up yet. At the bottom of the section click the link to Add a mail account as shown below.

Step 6: Create the New Alias email Account
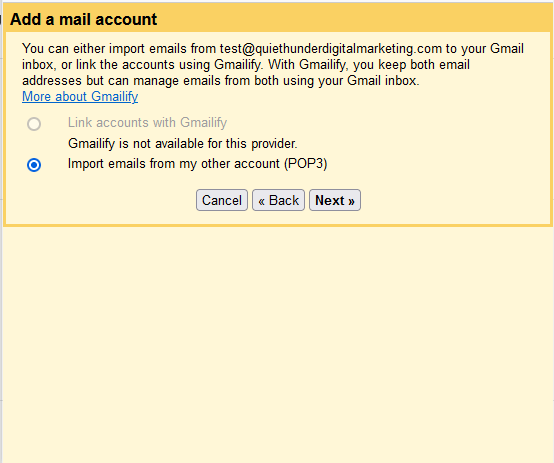
The following yellow box with pop up. Make sure your pop-up blocker did not stop it from opening. Input the email address you want to link to your Gmail account and click Next.

In the next pop up select Import emails from my other account (POP3) like below and select Next.
Using the information from step one fill in your Username, Password, POP Server name and select the correct Port.
Unless you plan to log into your email on the domain server regularly and keep it cleaned up, I’d recommend not leaving a copy of the email on the server. So leave the first box unchecked.
It’s recommended to check the next box to Always use a secure connection (SSL) when retrieving mail.
Click Add Account

Your email alias has now been set up and you will be able to read all incoming email in your Gmail account. Assuming you also would like to send email from your Gmail account to look like your domain email address, you will also now need to configure the outgoing mail. Select Yes, I want to be able to send mail and click Next.

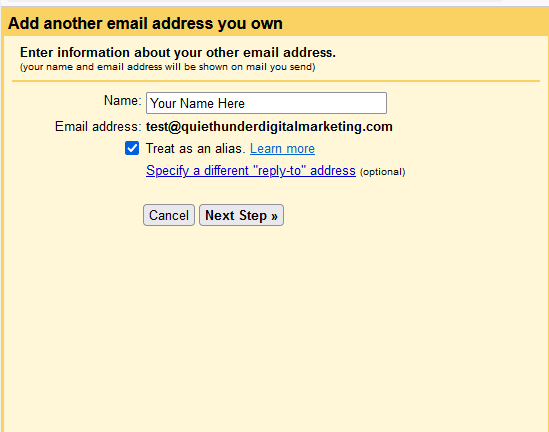
Enter the name you want everyone to see associated with this email address. It can be your personal name or your business name. Then select Treat as an alias and click Next Step.
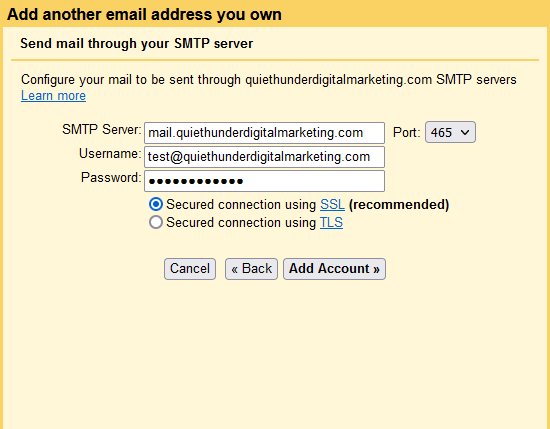
Once again you'll need to use the information from step one above to fill in your Username, Password, POP Server name and select the correct Port.
It’s recommended to check the recommended option for Secure connection using SSL. Then click Add Account.
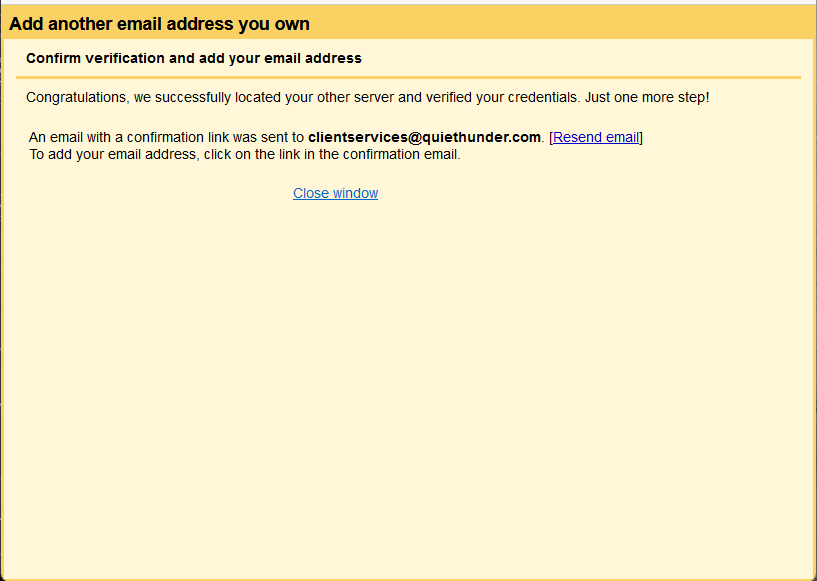
You'll receive the following message saying that Gmail successfully located your email server and verified your credentials. Google will now send a confirmation request email to the email address you are setting up in order to confirm. Close the window and check your mail.
You should have received an email similar to the one below, which has a link you need to click to confirm the message was received.

After you click the link to confirm, the following new window will open to confirm your request.

After clicking confirm you will immediately receive the following message from Google confirming the email link has successfully been set up.

Your Gmail is now configured and set up to start receiving all your email. Repeat steps 3, 4, and 5 to go back to your Gmail setting and look at the section 'Check mail from other accounts:'. You will now see the new email alias you just set up. Below is the one we set up for this example.

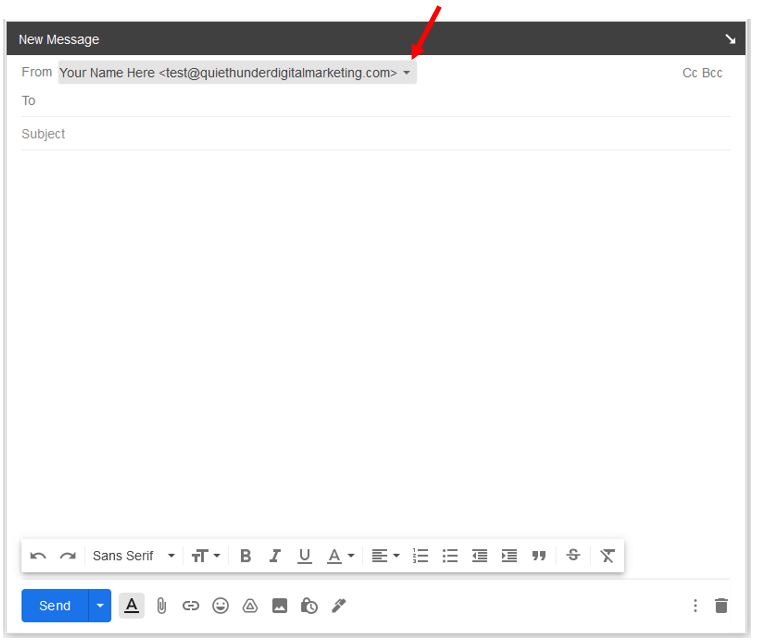
You can test everything by sending a test email to another email account you have and also sending a test email from Gmail. When you click on Compose email you will see a drop down option at the top for your 'From' email address. Select the email you want to show the email being sent from, select your business email and it will look just like it was sent from your domain server from your website when people read your email.
You're all set! If you have additional emails you want to set up, you can go through the same process to set them up. Gmail allows you to add up to 5 alias emails.
